Everything You Need to Know About Portrait Photography
Portrait photography stands at the intersection of art and science, demanding a photographer's attention to both the technical aspects of camera handling and the subtleties of human emotion. This dual nature makes portrait photography both challenging and rewarding.
23 min read
Capturing the essence of a person through a lens is an art that requires skill, patience, and practice. Portrait photography is more than just taking a picture; it’s about telling a story through the eyes of your subject. Whether you’re a beginner or an experienced photographer, mastering the techniques of portrait photography can elevate your craft to new heights.
To get the most out of your portrait photography sessions, it’s essential to understand the fundamentals, including posing techniques and lighting. By learning from the experts and practicing your skills, you can create stunning portraits that reveal the character and personality of your subjects. For more in-depth guidance, you can explore resources like The School of Photography, which offers valuable portrait photography tips.
Key Takeaways
- Understand the basics of portrait photography
- Master posing techniques for natural-looking portraits
- Learn how to work with lighting to enhance your subject
- Discover tips for capturing the personality of your subject
- Explore resources for further learning and improvement
The Art and Science of Portrait Photography
Portrait photography stands at the intersection of art and science, demanding a photographer’s attention to both the technical aspects of camera handling and the subtleties of human emotion. This dual nature makes portrait photography both challenging and rewarding.
What Makes a Great Portrait
A great portrait is more than just a likeness of the subject; it captures their personality, mood, and essence. Lighting plays a crucial role in this, as it can dramatically alter the mood of the image. The best portrait lenses can also contribute to a more flattering and professional result.
The composition of the photograph, including the background and the subject’s pose, is equally important in creating a compelling portrait.
The Psychology Behind Compelling Portraits
The psychology behind a portrait involves understanding the subject’s personality and how to bring out their natural expression. Building rapport with the subject is crucial, as it helps them feel more comfortable and relaxed in front of the camera.
A photographer’s ability to direct and interact with their subject can significantly impact the outcome of the portrait, making the image more authentic and engaging.
Essential Portrait Photography Tips for Beginners
Portrait photography, at its core, is about creating a meaningful connection with your subject. This connection is what sets great portraits apart from ordinary ones. As a beginner, focusing on a few key areas can significantly improve your portrait photography skills.
Building Rapport with Your Subject
Building rapport with your subject is crucial for capturing authentic and engaging portraits. Start by being genuinely interested in them and their story. Ask open-ended questions to help them relax and be themselves in front of the camera. This interaction not only makes the subject feel more comfortable but also provides valuable insights that can guide your photography approach.
Composition Basics for Portraits
Understanding composition basics is vital for creating visually appealing portraits. Rule of thirds is a fundamental principle where you divide the frame into thirds both horizontally and vertically, placing your subject’s eyes or other key features along these lines or at their intersections. Experimenting with different angles and perspectives can also add variety to your portraits.
Starting with Available Light
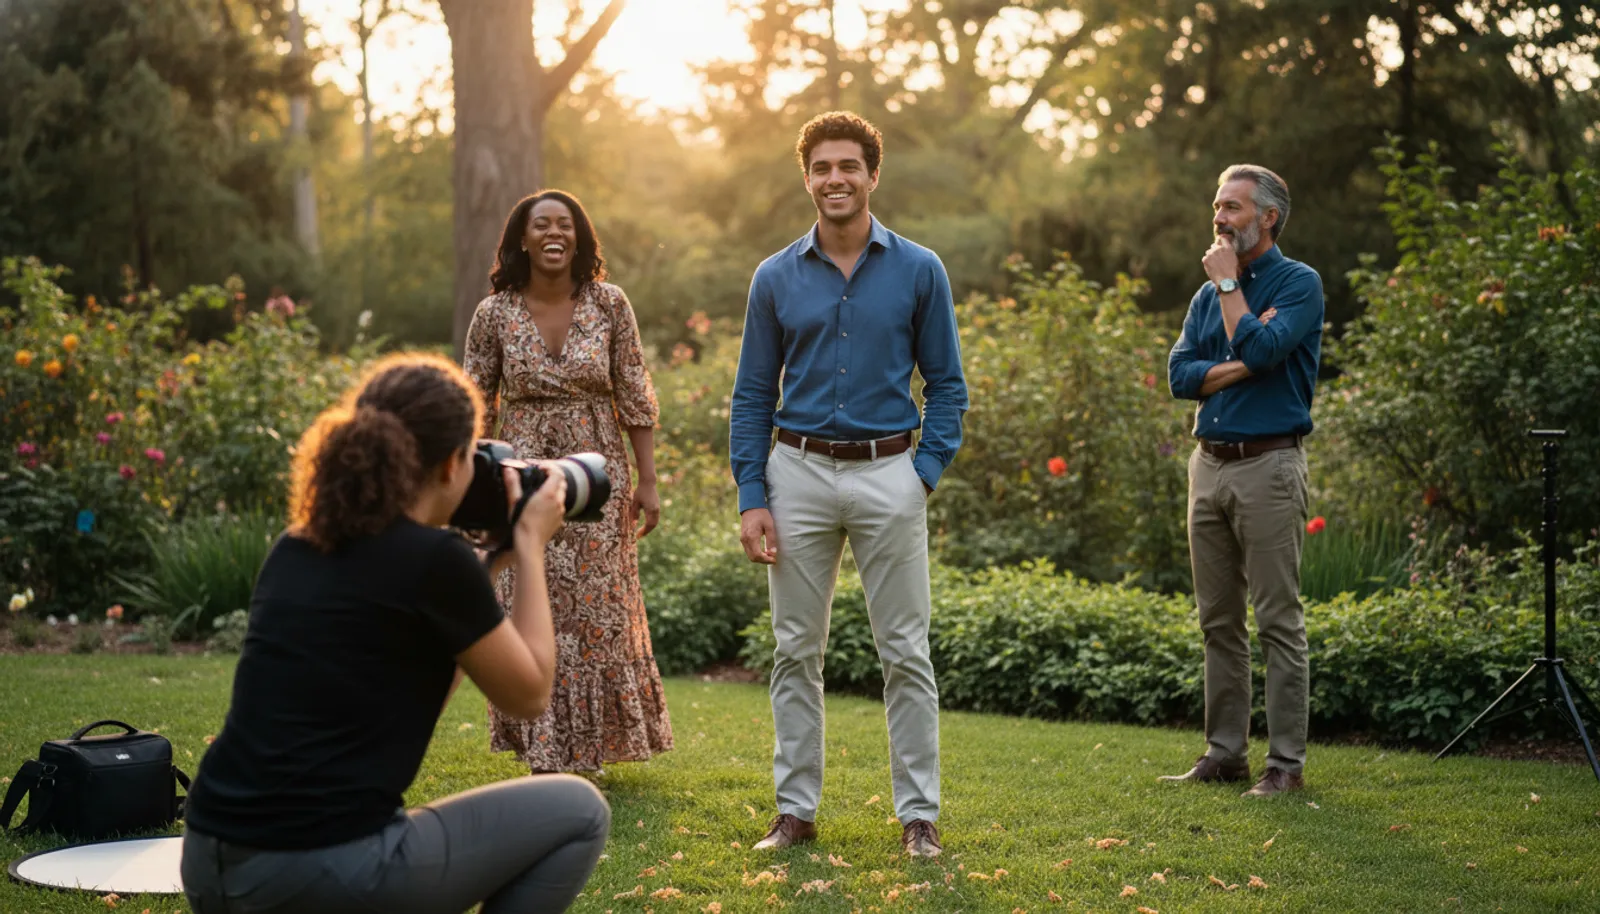
Available light, or natural light, is one of the most accessible and flattering light sources for portrait photography. When shooting indoors, position your subject near a window to utilize soft, indirect light. Avoid harsh midday sun when shooting outdoors, as it can create unflattering shadows. Instead, opt for the golden hour, just before sunset, for warm and soft lighting that enhances your subject’s features.
By focusing on these essential tips—building rapport, understanding composition basics, and utilizing available light effectively—you can significantly enhance your portrait photography skills. Remember, practice is key, so keep experimenting and learning from each experience.
Choosing the Right Camera for Portrait Photography
When it comes to capturing stunning portraits, the camera you choose plays a crucial role in determining the outcome. With so many options available, understanding the strengths and weaknesses of different camera types is essential for making an informed decision.
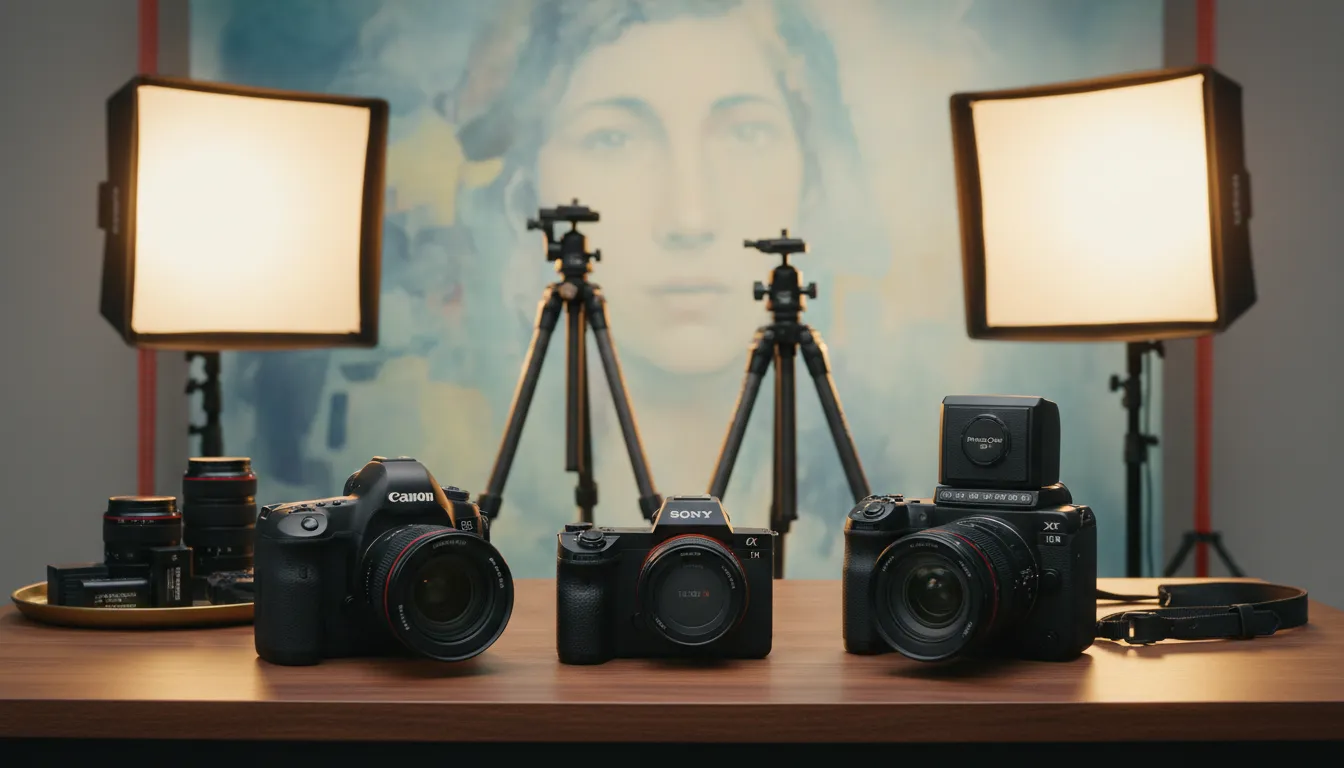 For portrait photography, two primary considerations are the type of camera and the sensor size. The debate between DSLR vs. Mirrorless cameras continues, with each having its unique advantages.
DSLR vs. Mirrorless for Portraits
DSLR cameras have been the traditional choice for many photographers, offering a wide range of lenses and accessories. However, mirrorless cameras are gaining popularity due to their compact size, faster autofocus, and advanced video capabilities. For portraits, mirrorless cameras can offer more precise focusing and better subject tracking. For more insights on the best cameras for portrait photography, you can check out this article.
Full-Frame vs. Crop Sensor Considerations
The choice between Full-Frame and Crop Sensor cameras significantly impacts portrait photography. Full-Frame sensors generally provide a shallower depth of field and better low-light performance, making them ideal for creating professional-grade portraits with a blurred background. Crop sensors, while not offering the same level of background blur, can still produce excellent results, especially when paired with the right lenses, such as the best portrait lenses available in the market.
Ultimately, the best camera for portrait photography is one that fits your budget, meets your technical requirements, and feels comfortable to use. By considering these factors and staying informed about the latest portrait photography tips, you can make a more informed decision and elevate your portrait photography to the next level.
Best Portrait Lenses for Stunning Results
When it comes to capturing stunning portraits, the right lens can make all the difference. The choice of lens can significantly impact the quality and aesthetic of your portrait photography.
Prime Lenses for Portrait Photography
Prime lenses are often preferred for portrait photography due to their wide aperture, which allows for a shallow depth of field, blurring the background and making the subject stand out. They also tend to be sharper and have less distortion compared to zoom lenses.
50mm: The Versatile Standard
A 50mm lens is considered a standard prime lens and is highly versatile. It’s close to the human eye’s field of view, making it ideal for capturing natural-looking portraits. It’s also compact and usually more affordable than other prime lenses.
85mm: The Classic Portrait Lens
An 85mm lens is often regarded as the classic portrait lens. It provides a flattering perspective and a pleasing bokeh (out-of-focus area). This focal length is particularly good for compressing features and creating a slimming effect.
135mm: The Compression Master
A 135mm lens offers even more compression than an 85mm, making it excellent for portraits where you want to isolate the subject from the background. It’s particularly useful for headshots and can create a very professional look.
Zoom Lenses for Versatile Portrait Sessions
While prime lenses have their advantages, zoom lenses offer flexibility and convenience, especially during location shoots or when working with multiple subjects. A good zoom lens can cover a range of focal lengths, making it easier to adjust your composition without changing lenses.
For example, a 70-200mm zoom lens is highly versatile and can be used for a variety of portrait shots, from standard to telephoto. This range allows for capturing different perspectives without the need to change lenses, which can be particularly useful in fast-paced shooting environments.
Camera Settings for Perfect Portraits
To take your portrait photography to the next level, understanding and controlling camera settings is essential. The right settings can significantly enhance the quality of your portraits, making them more captivating and professional.
Aperture and Depth of Field
Aperture is one of the most critical camera settings for portrait photography. It controls the depth of field, which is the area in focus in front of and behind your subject. A wide aperture (low f-stop number) like f/1.4 or f/2.8 creates a shallow depth of field, blurring the background and emphasizing your subject. This is particularly useful for isolating your subject from distracting backgrounds.
Shutter Speed Considerations
Shutter speed is another vital setting that can make or break your portrait. A fast shutter speed is necessary to freeze motion and avoid blur, especially if your subject is moving. However, in low-light conditions, you might need to slow down your shutter speed, which requires a tripod to prevent camera shake. Typically, a shutter speed of 1/125s to 1/200s is sufficient for most portrait photography.
ISO and Noise Management
ISO settings determine your camera’s sensitivity to light. For portrait photography, it’s best to keep the ISO as low as possible (preferably ISO 100 or 200) to minimize noise and ensure the image is as clean and detailed as possible. Higher ISOs can introduce grain or digital noise, detracting from the overall quality of your portrait.
By mastering these camera settings, you can significantly improve your portrait photography skills. Remember, practice makes perfect, so don’t be afraid to experiment with different settings to find what works best for you.
- Use a wide aperture to create a shallow depth of field.
- Adjust shutter speed based on the lighting conditions and subject movement.
- Keep ISO low to minimize noise.
Mastering Lighting for Portrait Photography
Effective lighting is the backbone of stunning portrait photography. It can elevate the mood, accentuate the subject’s features, and create a lasting impression on the viewer. Whether you’re shooting in a studio or outdoors, understanding how to manipulate light is crucial for capturing portraits that stand out.
Natural Light Techniques
Natural light offers a soft, flattering illumination that can enhance your portraits. Utilizing natural light effectively requires an understanding of its various forms and how to work with them.
Golden Hour Portraits
The golden hour, just before sunset or after sunrise, provides a warm, soft light that is ideal for capturing portraits with a natural, pleasing glow. This light is characterized by its low angle and warm tones, which can add depth and warmth to your images.
Working with Shade and Diffused Light
Shade and diffused light are excellent for reducing harsh shadows and minimizing unflattering highlights on your subject’s face. Diffused light, in particular, wraps around the subject, creating a soft, even illumination that is forgiving and flattering.
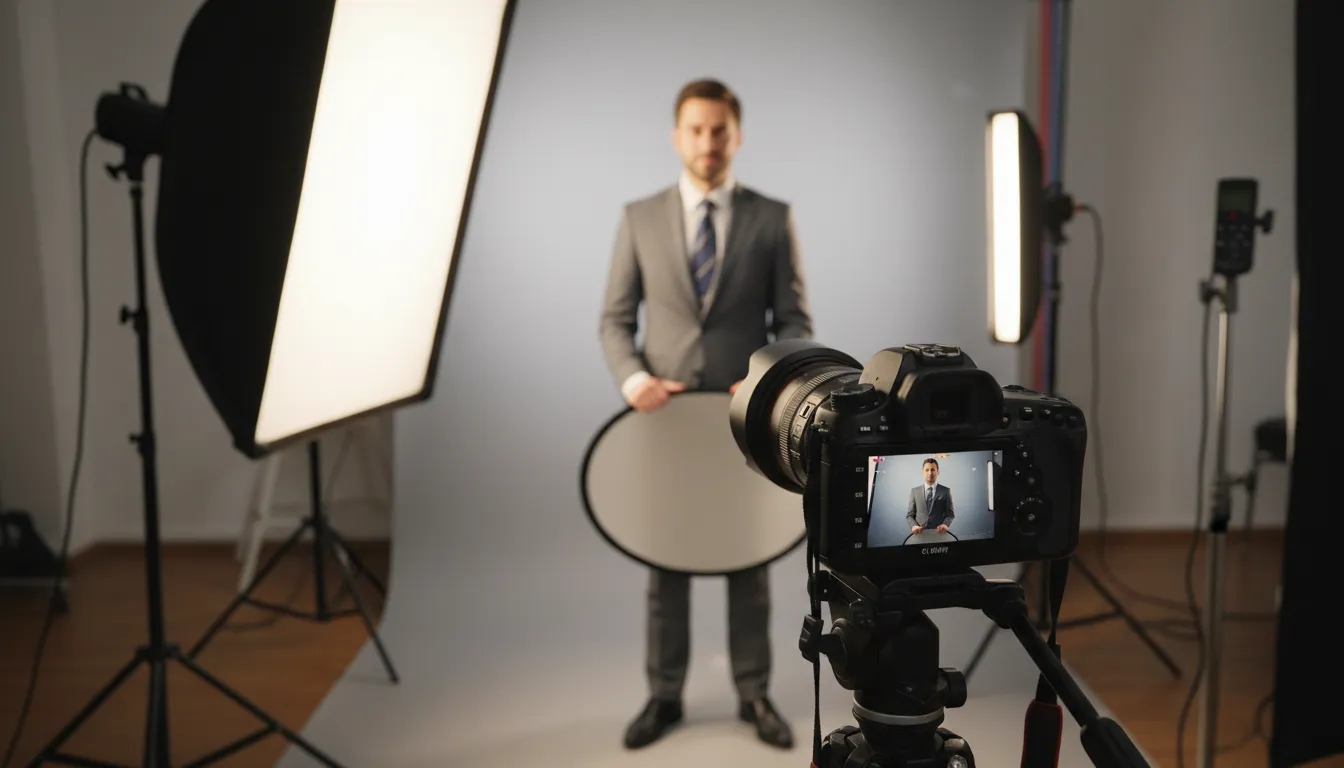
Studio Lighting Setups
Studio lighting gives you control over the illumination, allowing you to create a variety of effects and moods. From simple setups to complex configurations, understanding studio lighting is key to producing professional-grade portraits.
One-Light Portraits
A single light source can be used to create dramatic, high-contrast portraits. By positioning the light carefully, you can accentuate your subject’s features and create deep shadows that add depth to the image.
Three-Point Lighting
Three-point lighting is a classic technique that involves using three light sources to create a balanced, well-illuminated portrait. This setup includes a key light, a fill light, and a backlight, which together provide a comprehensive lighting solution that highlights the subject’s features while minimizing shadows.
Using Reflectors and Diffusers
Reflectors and diffusers are invaluable tools for modifying light to suit your portrait photography needs. Reflectors bounce light onto the subject, filling in shadows and adding depth, while diffusers soften harsh light, reducing unflattering highlights and creating a more even illumination.
 By mastering these lighting techniques, you can significantly enhance your portrait photography, capturing images that are not only visually appealing but also emotionally engaging. Whether you’re working with natural light, studio setups, or modifiers like reflectors and diffusers, the key is to experiment and understand how different lighting approaches can transform your portraits.
Essential Posing Techniques for Portraits
Posing is an art that, when done correctly, can elevate portrait photography to new heights. A well-posed subject can convey confidence, elegance, or playfulness, making the portrait more engaging and memorable.
Facial Expressions and Head Positioning
The facial expression is a critical aspect of a portrait. A relaxed and natural expression can be achieved by engaging the subject in conversation or asking them to relax their facial muscles. The positioning of the head can also significantly impact the portrait. Slightly tilting the head can add dynamism to the image, while a straight-on pose can convey confidence.
As legendary photographer Annie Leibovitz once said, “The camera is an instrument that teaches people how to see without a camera.” Understanding how to guide your subject’s facial expression and head positioning is crucial.
Hand and Arm Placement
The placement of hands and arms can either enhance or detract from the portrait. Placing hands in pockets or on hips can add a casual touch, while resting them on a surface can create a more relaxed atmosphere. It’s essential to avoid stiff or awkward placements that can make the subject appear uncomfortable.
- Place hands in a relaxed position, avoiding fists or overly tense fingers.
- Use arms to frame the face or add depth to the composition.
- Avoid crossing arms, as it can give the impression of being defensive or closed off.
Body Positioning for Different Body Types
Understanding how to pose different body types is crucial for creating flattering portraits. For example, posing a subject with a larger build at an angle can help slim their appearance, while a subject with a slender build can be posed in a way that creates more curves.
“The goal is to make the subject feel comfortable and confident, which in turn makes for a more compelling portrait.”
Advanced Portrait Photography Tips for Stunning Images
To elevate your portrait photography, it’s essential to master advanced techniques that can make your images truly stunning. One of the critical aspects of portrait photography is lighting, which can dramatically change the mood and quality of your photos.
Creative Lighting Techniques
Lighting can make or break a portrait. Creative lighting techniques can add depth and interest to your photos. Two effective techniques are:
Dramatic Split Lighting
Split lighting involves dividing the face into two equal parts, with one side lit and the other in shadow. This technique can create a dramatic effect and is particularly useful for adding depth to your portraits. For more on portrait photography techniques, visit Digital Photography School.
Rim Lighting and Silhouettes
Rim lighting involves positioning the light source behind the subject to create a highlight around the edges. This technique can help separate the subject from the background, adding a three-dimensional effect. Silhouettes, on the other hand, involve backlighting the subject to create a dark shape against a brighter background.
Directing Your Subjects Effectively
Directing your subjects is crucial for capturing natural and relaxed portraits. Here are some tips for effective direction:
- Use clear and simple instructions to guide your subject into the desired pose.
- Encourage your subject to relax by creating a comfortable atmosphere.
- Experiment with different poses and expressions to find what works best for your subject.
By mastering posing techniques for portraits, you can significantly improve the quality of your photos and make your subjects feel more at ease.
Working with Different Portrait Subjects
The art of portrait photography lies in its ability to accommodate a wide range of subjects.
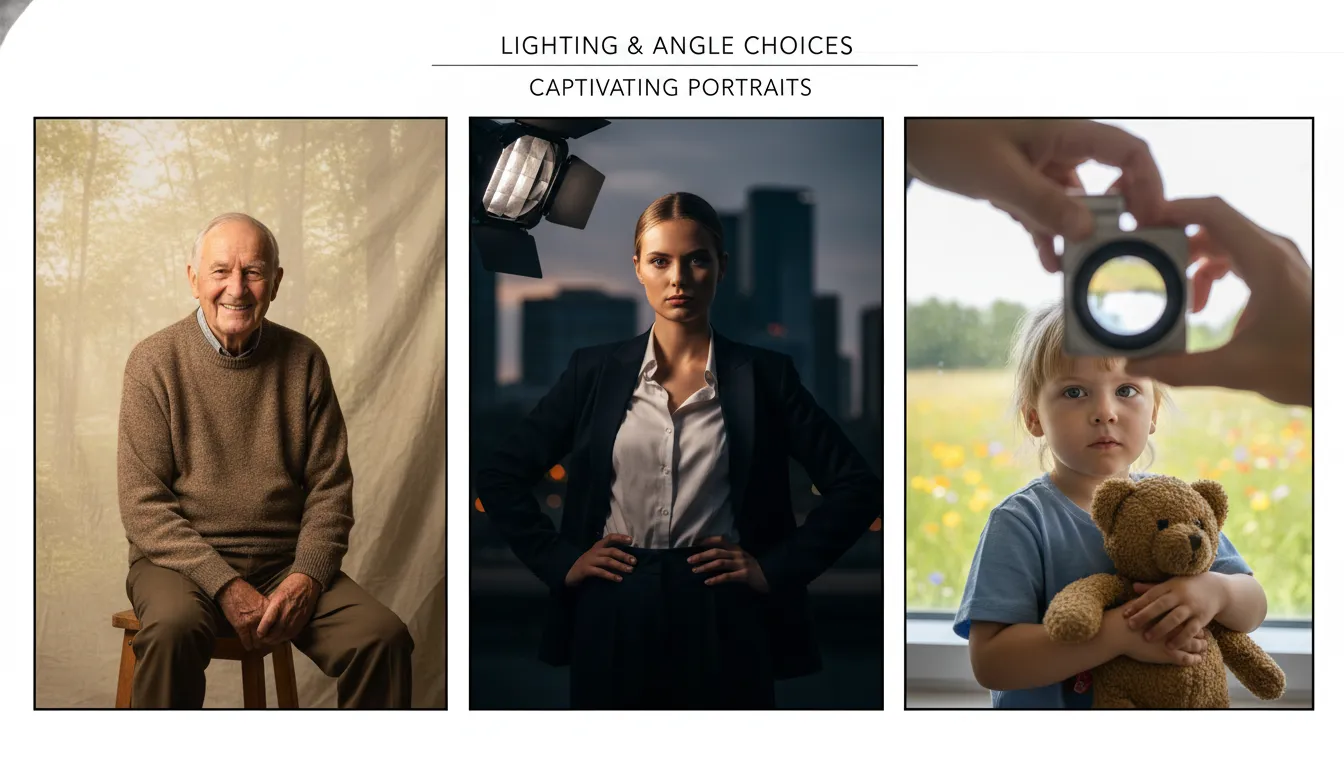
Portrait photography encompasses a broad spectrum of subjects, each requiring a tailored approach. Whether you’re photographing children, seniors, or professionals, understanding your subject’s unique needs and characteristics is crucial.
Photographing Children and Families
When photographing children and families, creating a comfortable and playful atmosphere is essential. Engaging with your subjects and making them feel at ease can result in more natural and authentic expressions.
- Use toys or props to distract and entertain children.
- Encourage interaction between family members.
- Be prepared to capture spontaneous moments.
Capturing Authentic Senior Portraits
Senior portraits often require a more personalized approach, highlighting the individual’s personality and interests. Paying attention to details such as wardrobe and background can enhance the authenticity of the portrait.
“A great portrait captures the essence of the person, not just their likeness.”
Professional Headshots and Business Portraits
For professional headshots and business portraits, a more formal and polished approach is typically required. Attention to lighting and composition is critical to creating a professional image.
- Use a plain background to focus attention on the subject.
- Adjust lighting to minimize harsh shadows.
- Direct your subject to relax and be themselves.
 By adapting your approach to the specific needs of your subject, you can capture portraits that are not only visually appealing but also meaningful and authentic.
Location Scouting for Portrait Sessions
Location scouting is a vital step in planning a portrait session that captures the desired mood. The right location can elevate your portraits, making them more engaging and meaningful.
Indoor vs. Outdoor Locations
When deciding between indoor and outdoor locations, consider the theme and mood you want to convey. Indoor locations offer controlled environments, ideal for studio-like settings or when weather conditions are unfavorable. Outdoor locations, on the other hand, provide natural light and diverse backdrops that can add depth and character to your portraits. For tips on making the most of outdoor portraits, check out 13 tips for improving outdoor portraits.
Using Environment to Tell a Story
The environment can play a significant role in telling the story of your subject. By incorporating elements of the location into your composition, you can add context and narrative to your portraits. For instance, using a meaningful background or incorporating posing techniques for portraits that interact with the environment can enhance the storytelling aspect. Consider how lighting for portraits can be utilized to highlight these elements and create a more compelling image.
| Location Type | Advantages | Considerations |
|---|---|---|
| Indoor | Controlled environment, ideal for studio settings | Limited by space and lighting conditions |
| Outdoor | Natural light, diverse backdrops | Weather conditions, potential distractions |
Exploring the various styles of portrait photography reveals the breadth of creative possibilities available to photographers. Portrait photography is not a one-size-fits-all genre; it encompasses a wide range of approaches and techniques, each with its unique aesthetic and storytelling potential.
Environmental Portraits
Environmental portraits capture individuals in their natural surroundings, providing context to their story. This style is particularly effective for conveying a subject’s profession or personality through their environment. Best portrait lenses for environmental portraits often include wide-angle lenses that can capture both the subject and their surroundings effectively.
Fine Art Portraiture
Fine art portraiture focuses on the artistic expression of the photographer, often using the subject as a medium for creative exploration. This style allows for significant experimentation with lighting, composition, and post-processing techniques. Fine art portraits can be highly stylized and are often used to convey a specific mood or theme.
Documentary-Style Portraits
Documentary-style portraits aim to capture real, unposed moments, often telling a story about the subject’s life or environment. This style requires patience and the ability to blend into the background, allowing for authentic moments to be captured. Portrait photography tips for documentary-style portraits include being observant and anticipating significant moments.
| Style | Description | Key Elements |
|---|---|---|
| Environmental | Captures subjects in their natural environment | Contextual storytelling, wide-angle lenses |
| Fine Art | Focuses on artistic expression | Creative lighting, composition, post-processing |
| Documentary-Style | Captures real, unposed moments | Authenticity, patience, observational skills |
Post-processing is the unsung hero of portrait photography, transforming good photos into breathtaking masterpieces. It’s a crucial step that can elevate your portraits from good to great, making a significant difference in how your work is perceived.
Essential Lightroom Adjustments
Lightroom is a powerful tool for editing portraits, offering a range of adjustments that can enhance your images. Two key areas to focus on are color grading and local adjustments.
Color Grading for Mood
Color grading is a technique used to create a specific mood or atmosphere in your portraits. By adjusting the colors, you can evoke emotions and add depth to your images. For example, warm tones can create a cozy and inviting feel, while cool tones can produce a more distant or melancholic mood.
Local Adjustments for Emphasis
Local adjustments allow you to target specific areas of your portrait, making it possible to enhance or correct particular features without affecting the rest of the image. This can be especially useful for drawing attention to your subject’s eyes or smoothing out skin tones.
Photoshop Techniques for Skin Retouching
Photoshop offers advanced tools for skin retouching, enabling you to achieve flawless portraits. Two essential techniques are frequency separation and dodge and burn.
Frequency Separation
Frequency separation is a method that allows you to separate the texture of the skin from its tone, making it easier to retouch without losing the natural texture. This technique is invaluable for removing blemishes and imperfections while maintaining a natural look.
Dodge and Burn for Dimension
Dodge and burn are traditional darkroom techniques that have been adapted in Photoshop to add depth and dimension to your portraits. By selectively brightening (dodging) and darkening (burning) areas of the image, you can create a more three-dimensional appearance, enhancing the overall impact of your portrait.
| Technique | Purpose | Software |
|---|---|---|
| Color Grading | Create Mood/Atmosphere | Lightroom |
| Local Adjustments | Enhance/Correct Features | Lightroom |
| Frequency Separation | Skin Retouching | Photoshop |
| Dodge and Burn | Add Dimension | Photoshop |
A well-crafted portfolio is essential for portrait photographers to attract new clients and stand out in a competitive market. Your portfolio is a reflection of your skill and style, and it should be treated as such.
Developing Your Unique Style
To stand out, you need to develop a unique style that sets you apart from other photographers. This involves experimenting with different posing techniques for portraits and understanding how to use best portrait lenses to achieve the desired effect. Your style should be consistent across your portfolio, making it instantly recognizable.
Showcasing Your Best Work
Selecting the right images for your portfolio is crucial. You should curate your work to showcase your best pieces, demonstrating your expertise in portrait photography. For more tips on building a strong photography portfolio, you can visit Digital Photography School.
Common Portrait Photography Mistakes to Avoid
Portrait photography can be challenging, but avoiding common mistakes can significantly improve your results. Whether you’re a beginner or an experienced photographer, understanding these pitfalls can help you capture more compelling and professional-looking portraits.
Technical Errors
Technical errors can make or break a portrait photograph. Two of the most common issues involve focus and exposure.
Focus and Sharpness Issues
Ensuring your subject is in sharp focus is crucial. Use the right autofocus mode and consider using a wide aperture to create a shallow depth of field, making your subject stand out.
Exposure and White Balance Problems
Incorrect exposure can lead to unflattering lighting, while poor white balance can result in unwanted color casts. Use your camera’s metering modes and adjust white balance settings to match your lighting conditions.
Subject Interaction Missteps
How you interact with your subject can greatly affect the outcome of your portrait.
Forced Poses and Expressions
Forcing your subject into unnatural poses or expressions can lead to uncomfortable and unflattering results. Instead, guide them gently into more natural positions.
Failing to Connect with Subjects
Building a rapport with your subject is essential for capturing authentic portraits. Take the time to talk to them, understand their personality, and make them feel at ease.
By avoiding these common mistakes, you can significantly enhance your portrait photography skills. Remember, practice makes perfect, so keep experimenting and learning from your experiences.
Conclusion
With the wealth of knowledge on portrait photography tips and posing techniques for portraits, you’re now equipped to take your photography skills to the next level. Experimenting with different backgrounds, like unexpected locations, can add a unique flair to your photos. For instance, capturing self-portraits at a gas station can create a fascinating composition.
To further enhance your skills, consider exploring resources that provide additional guidance, such as the tips on self-portrait photography. By applying these techniques and continually practicing, you’ll be able to capture stunning portraits that showcase your creativity and skill.
As you continue on your photography journey, remember that the key to mastering portrait photography lies in practice and experimentation. Don’t be afraid to try new things and push the boundaries of your creativity.
FAQ
What are the best lenses for portrait photography?
The best lenses for portrait photography are typically prime lenses, such as the Canon EF 50mm f/1.2L USM, Nikon AF-S Nikkor 85mm f/1.4G, or Sony FE 85mm f/1.4 GM, which offer a wide aperture and beautiful bokeh. Zoom lenses like the Canon EF 24-70mm f/2.8L II USM or Nikon AF-S Nikkor 70-200mm f/2.8E FL ED VR are also versatile options.### How do I pose my subject for a portrait?
To pose your subject, start by having them relax and feel comfortable. Use simple poses like having them stand or sit with good posture, and experiment with different angles and facial expressions. Consider the Canon or Nikon posing guides for more detailed instructions.### What is the best lighting for portrait photography?
The best lighting for portrait photography depends on the desired effect, but natural light, studio strobes, or continuous lights like LED panels can all produce great results. Soft, diffused light is often flattering, and using reflectors or diffusers can help control the light.### How do I achieve a shallow depth of field in portrait photography?
To achieve a shallow depth of field, use a wide-aperture lens (like f/1.4 or f/2.8) and position your subject away from the background. This will help blur the background and emphasize your subject.### What camera settings are best for portrait photography?
For portrait photography, a wide aperture (like f/1.4 or f/2.8), a moderate shutter speed (around 1/125s), and a low ISO (100-400) are good starting points. Adjust these settings based on the lighting and the effect you want to achieve.### How do I retouch portraits in post-processing?
To retouch portraits, use software like Adobe Lightroom or Photoshop to adjust exposure, contrast, and color balance. For more detailed retouching, use techniques like frequency separation or dodge and burn to enhance the subject’s features and remove blemishes.### What are some common mistakes to avoid in portrait photography?
Common mistakes to avoid include technical errors like incorrect exposure or focus, and subject interaction missteps like forced poses or failing to connect with your subject. Be aware of these potential pitfalls to improve your portrait photography.### How can I build a strong portrait photography portfolio?
To build a strong portfolio, develop your unique style, and curate your best work. Showcase a variety of images that demonstrate your skills and versatility, and consider creating a cohesive visual narrative to attract clients and stand out in the industry.